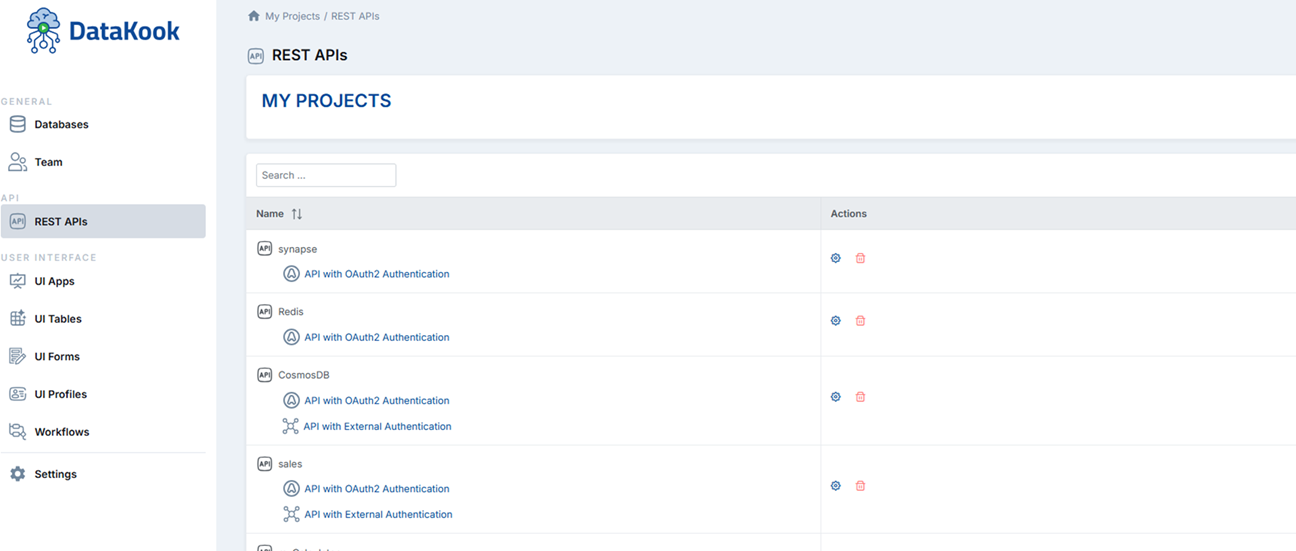
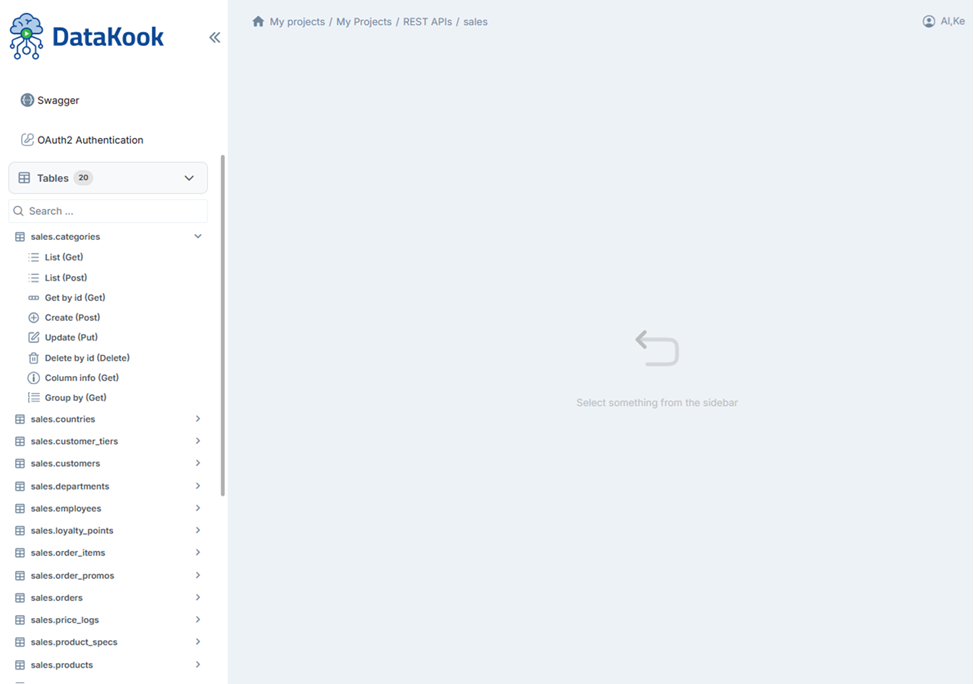
1. REST APIs Dashboard
DataKook's REST API builder lets you instantly expose any table, view, or saved query as a secure, standards-compliant API endpoint without writing a single line of server code. Once you declare a REST API for a database, DataKook automatically generates full CRUD endpoints (Create, Read, Update, Delete) for every table and view it contains.
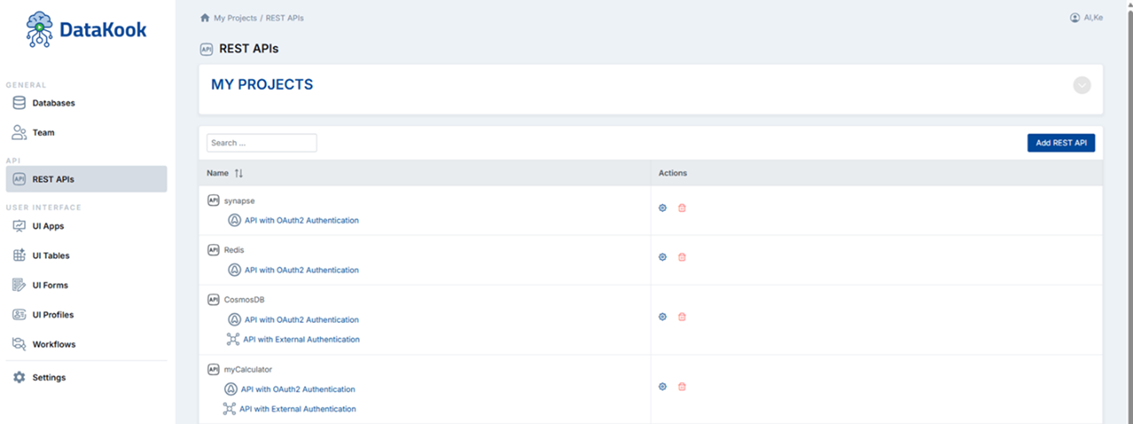
To get started, navigate to the REST APIs section from the main dashboard and click + Add REST API. Select the database you want to expose, give the API a name, and save. DataKook instantly provisions the endpoint routing. You can then click the gear (⚙) button next to the API to open the detailed configuration panel.
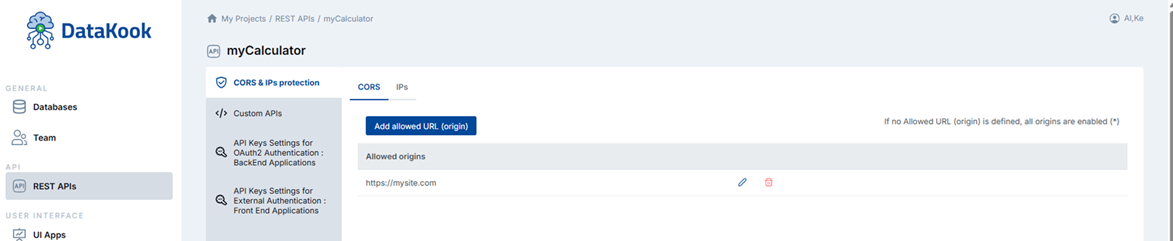
1.1 Protection
The Protection tab allows you to restrict which clients and networks are allowed to call your API. This is an important first layer of defense, preventing unauthorized origins from accessing your data endpoints even if they obtain a valid access token.
You can configure a whitelist of:
- Allowed URLs (Origins): Restrict API calls to specific front-end application origins. This enforces CORS (Cross-Origin Resource Sharing) policy cleanly, ensuring only your registered web apps can consume the API from browser environments.
- Allowed IP Addresses: Restrict server-to-server calls to specific IP ranges. Especially useful for backend integration where you control both sides of the connection and want network-level access control in addition to authentication.
You can combine IP and URL restrictions simultaneously for a defense-in-depth approach. If the list is left empty, no origin or IP filtering is applied and all authenticated requests are accepted.
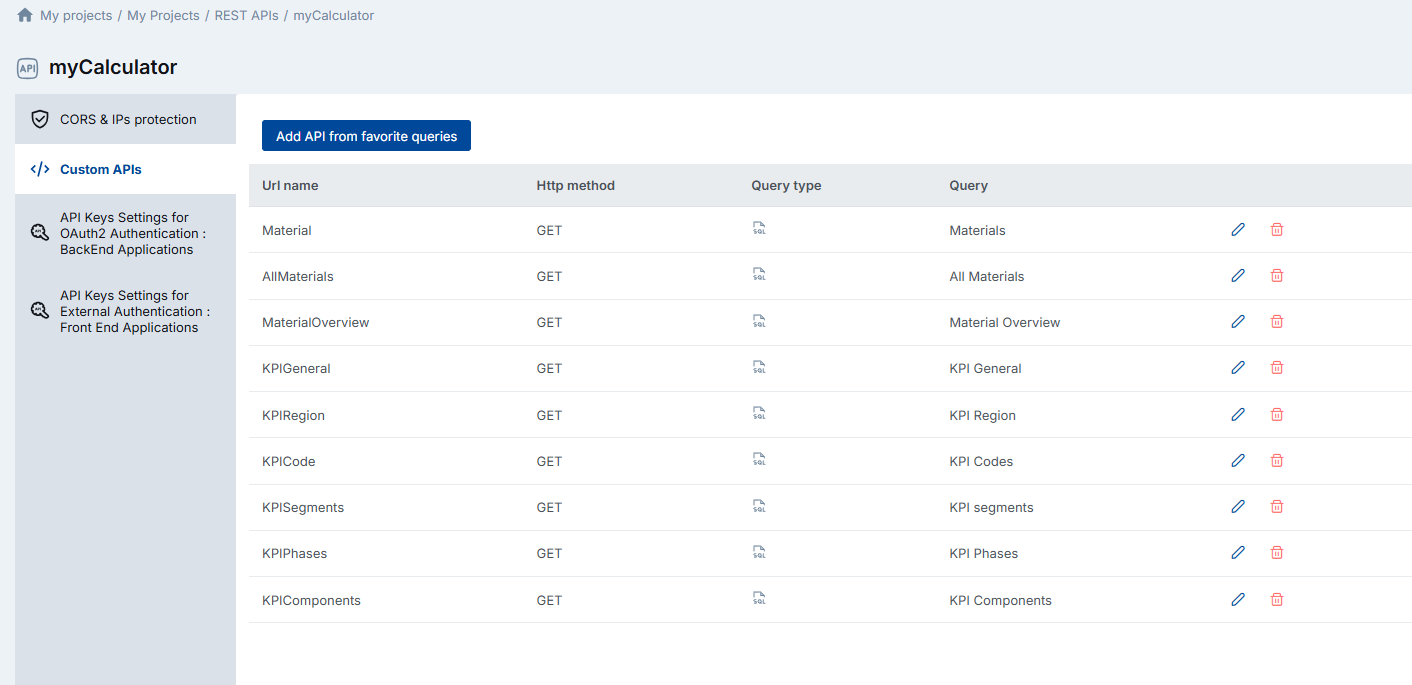
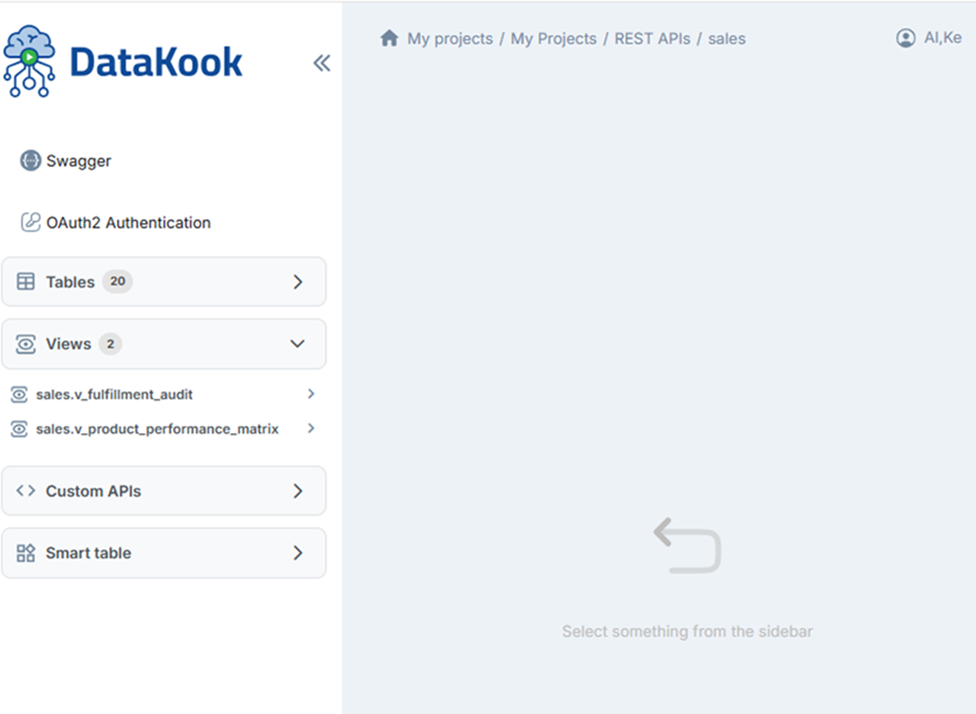
1.2 Custom APIs
While DataKook automatically generates standard CRUD endpoints for tables and views, the Custom APIs feature lets you promote any saved Favorite Query from the Database Dashboard into a dedicated REST endpoint.
This is particularly useful when you need to expose aggregated data sets, complex multi-table joins, parameterized reports, or business-specific data slices as clean API endpoints — all without building a custom backend service.
To create a Custom API, first save the query as a Favorite in the Database Dashboard, then return to the API configuration page and add it under the Custom APIs tab. The query is instantly exposed as a GET endpoint, and DataKook handles parameter binding, pagination, and result serialization automatically.
1.3 OAuth2 Authentication
OAuth2 authentication is the recommended method for server-to-server integrations where you can securely store client credentials in your backend. DataKook implements the standard Client Credentials Grant flow, making it compatible with any OAuth2-compliant API client or framework.
To configure OAuth2 for an API:
- You set your Client ID.
- A Client Secret is generated and displayed once. Store it securely.
- Configure the API Rights: choose which operations this client is allowed to perform —
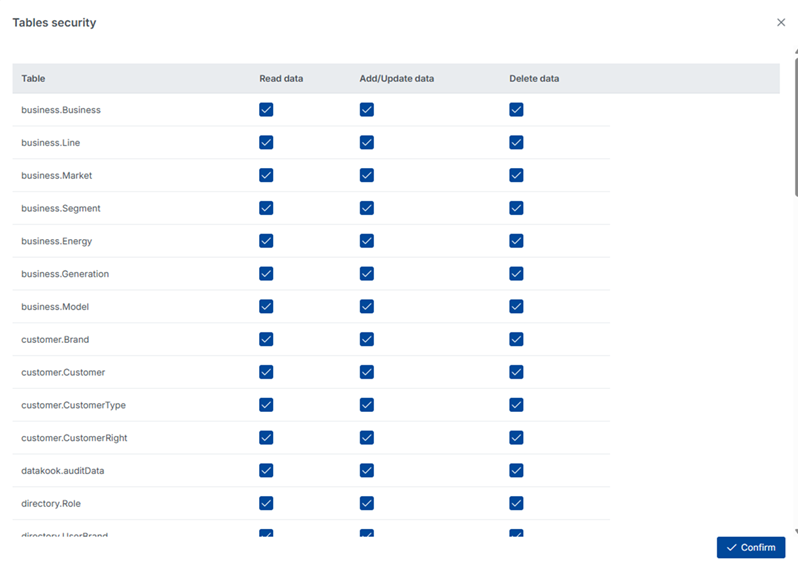
read,write, and/ordelete. - Optionally, apply granular table-level permissions by clicking the table icon next to the scope settings. This lets you restrict individual clients to specific tables or views rather than the entire database.
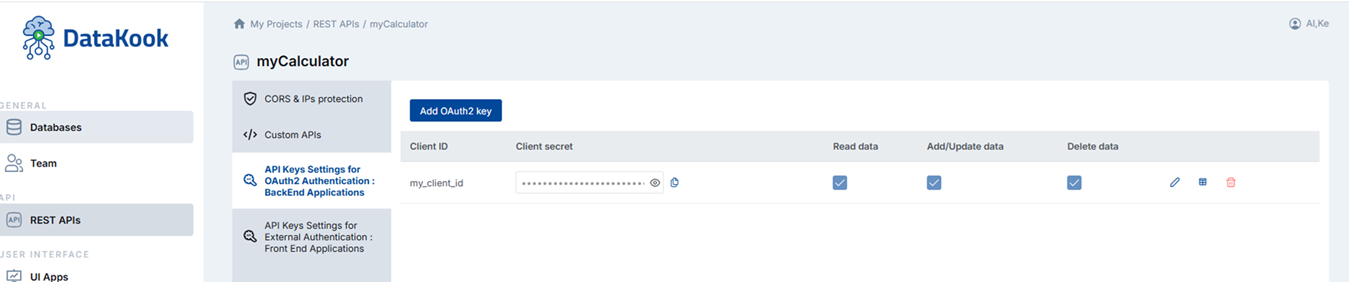
The OAuth2 token endpoint returns a short-lived access token (Bearer token) that your application must include in the Authorization header of every subsequent API request.
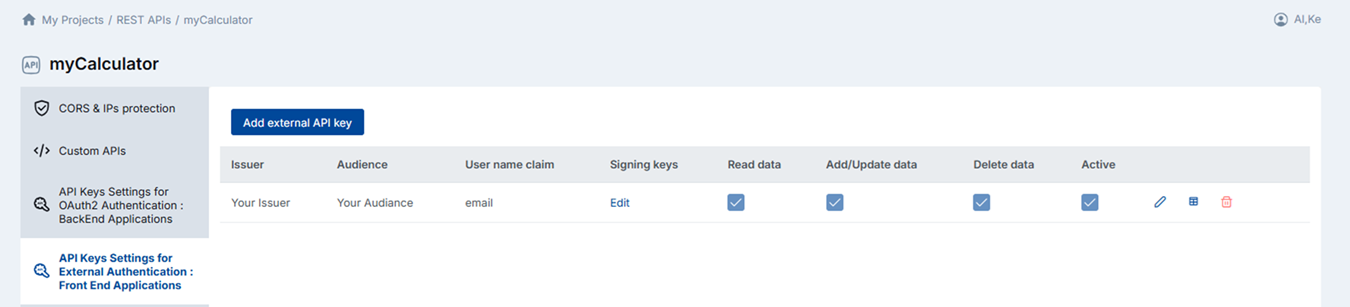
1.4 External Authentication
External Authentication enables you to use an existing JWT token issued by your own backend identity system to authenticate DataKook API calls. This is ideal when your frontend application already works with an identity provider (such as Auth0, Azure AD, Okta, or a custom JWT service) and you want to reuse those tokens to call DataKook APIs directly from the browser without exposing a client secret.
To configure, provide the following parameters that describe your JWT issuer:
- Issuer: The
issclaim value of your JWT tokens. - Audience: The
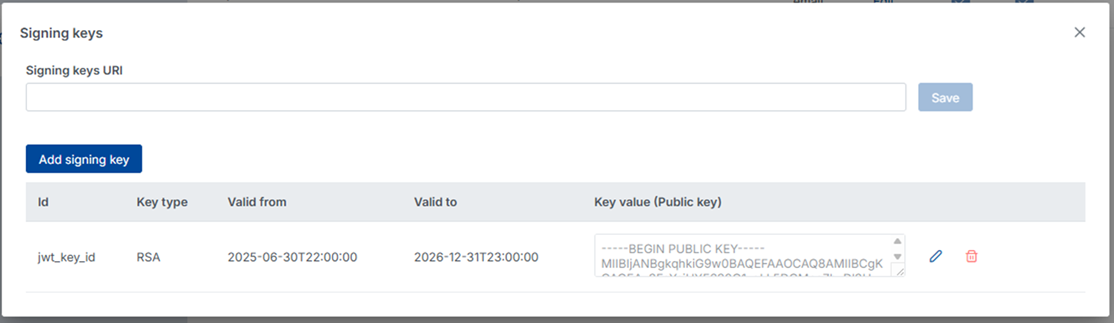
audclaim value. Identifies the intended recipient of the token. - Signing Key ID (kid): Optional. The key ID used to identify which public key should be used to verify the token signature.
- Key Signing Type: The algorithm used to sign the JWT — RSA, Elliptic Curve (EC), or HMAC.
- Validity Date Range: Define the time window during which tokens will be accepted.
- Public Key: The RSA or EC public key used to verify token signatures. Paste the PEM-encoded key directly in the configuration form.
Once configured, any request carrying a valid JWT Authorization: Bearer header that matches all of the above criteria is granted access to the API. Invalid, expired, or tampered tokens are rejected with an HTTP 401 Unauthorized response.
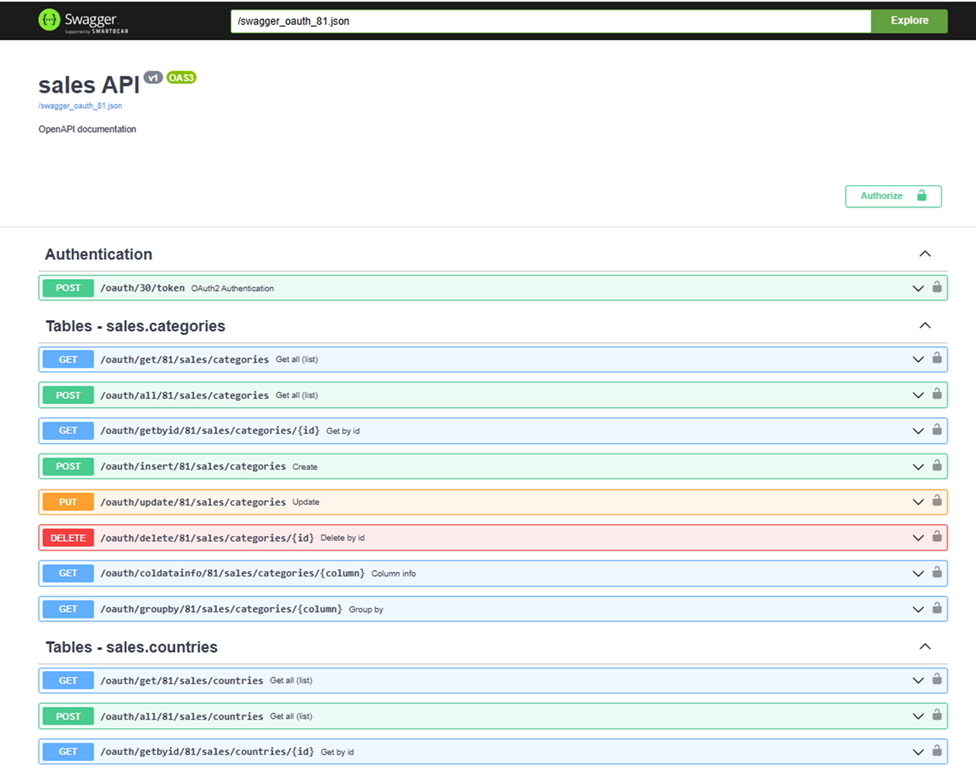
2. Test OAuth2 APIs & API Documentation
DataKook provides a built-in interactive API documentation and testing interface. Click API with OAuth2 Authentication from the REST APIs dashboard to open the documentation explorer, which lists every available endpoint organized by table, view, and custom query.
From this interface you can browse endpoint definitions, inspect required parameters and request bodies, execute live API calls directly against your DataKook instance, and export the full Swagger / OpenAPI specification for use with third-party tooling.
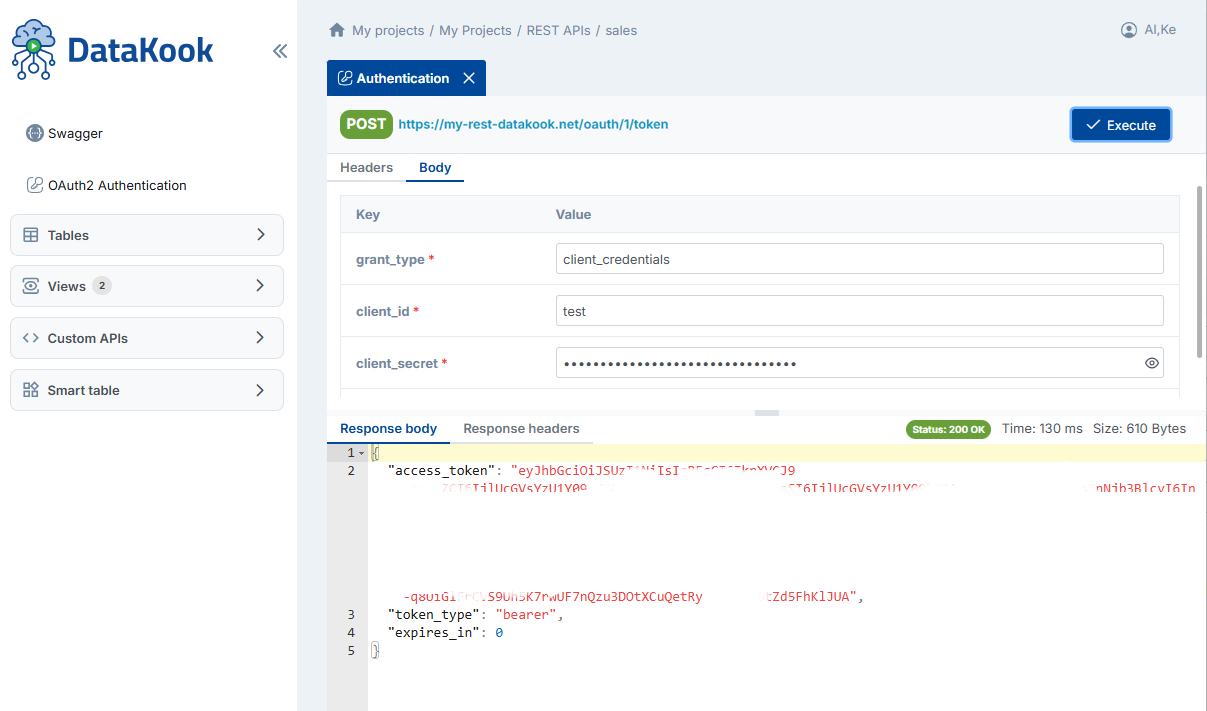
2.1 Authentication — Get Access Token
Before calling any protected endpoint, you must obtain an access token using your Client ID and Client Secret.
POST https://[YOUR_DATAKOOK_INSTANCE]/oauth/[api_id]/token

Content-Type: application/x-www-form-urlencoded

grant_type=client_credentials
&client_id=[Your Client ID]
&client_secret=[Your Client Secret]
&scope=read write delete
The response includes an access_token (Bearer token). Include this token in the Authorization header of all subsequent requests:
Authorization: Bearer [access_token]Tokens are short-lived. Your application should detect 401 responses and automatically refresh the token by repeating this request.
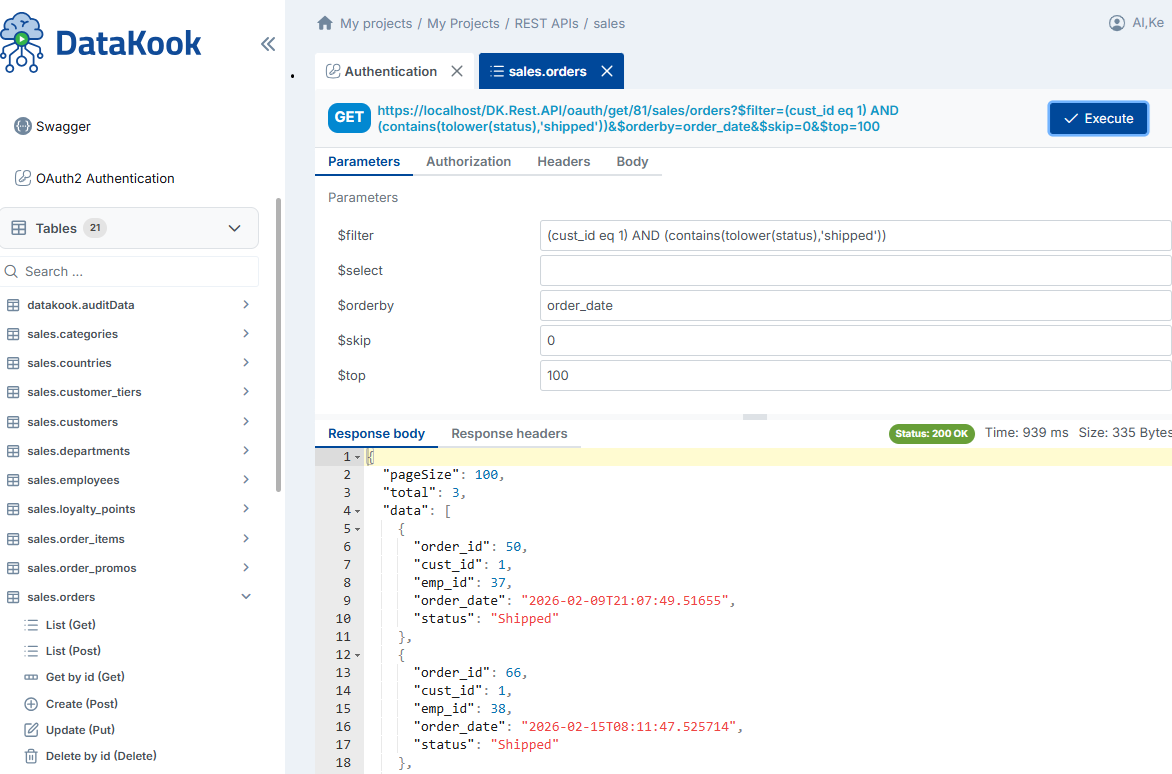
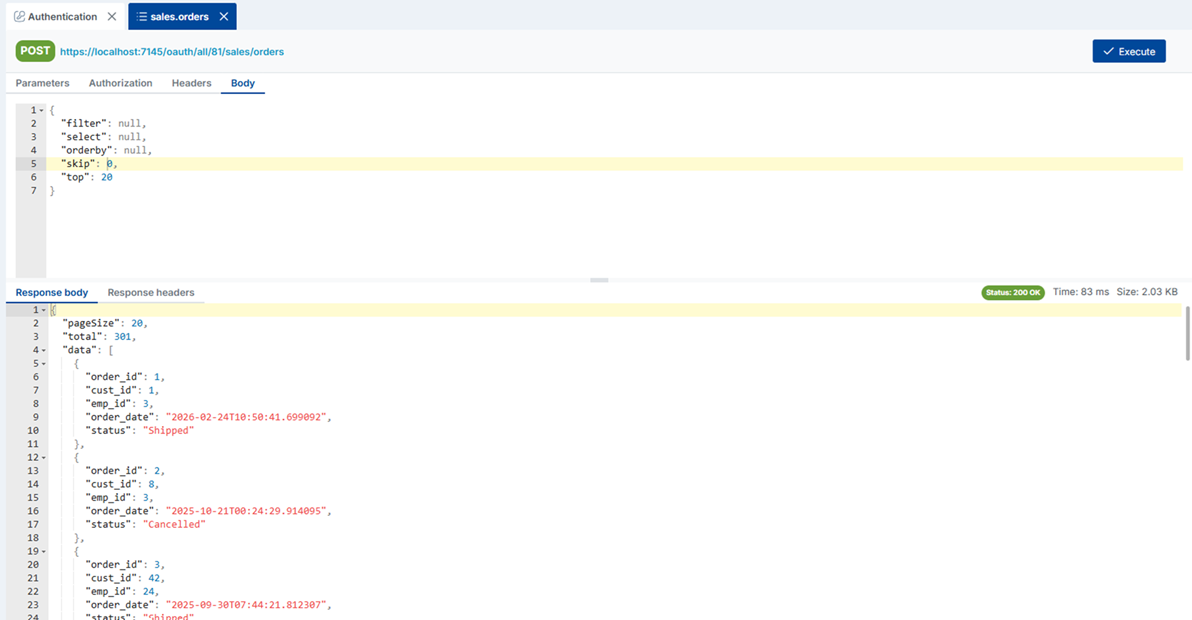
2.2 List Data
Retrieve a list of records from a table or view. DataKook supports both GET and POST to accommodate different client environments and payload sizes.
GET https://[YOUR_DATAKOOK_INSTANCE]/oauth/get/[db_id]/[schema]/[table]POST https://[YOUR_DATAKOOK_INSTANCE]/oauth/all/[db_id]/[schema]/[table]
Query parameters follow the OData protocol, supporting filtering ($filter), ordering ($orderby), pagination ($top / $skip), and field selection ($select). All parameters are optional.
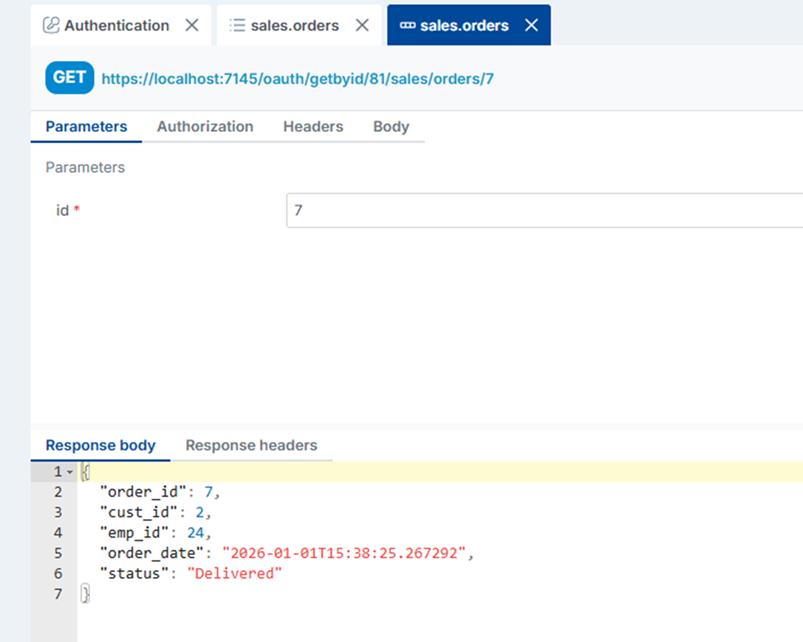
2.3 Get Record by ID
Retrieve a single record by its primary key.
GET https://[YOUR_DATAKOOK_INSTANCE]/oauth/getbyid/[db_id]/[schema]/[table]/[id]Returns HTTP 200 with the record on success, or 404 if no matching record exists.
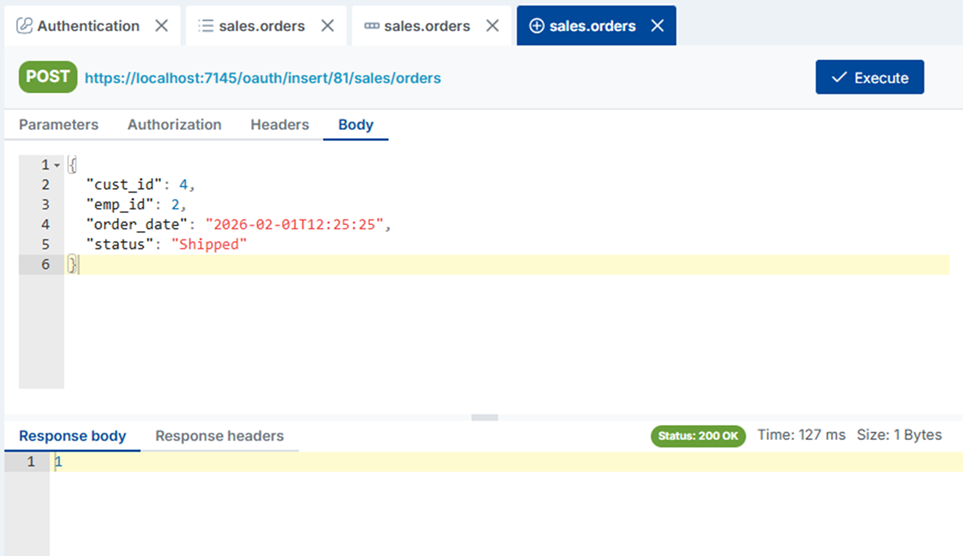
2.4 Create a New Record
Insert a new record into the specified table. The request body should be a JSON object whose keys match the table column names.
POST https://[YOUR_DATAKOOK_INSTANCE]/oauth/insert/[db_id]/[schema]/[table]

Content-Type: application/json
{ "column1": "value1", "column2": "value2", ... }| Status | Body | Meaning |
|---|---|---|
200 | 1 | Record created successfully |
401 | — | No token or token expired |
400 | Error message | Validation or database error |
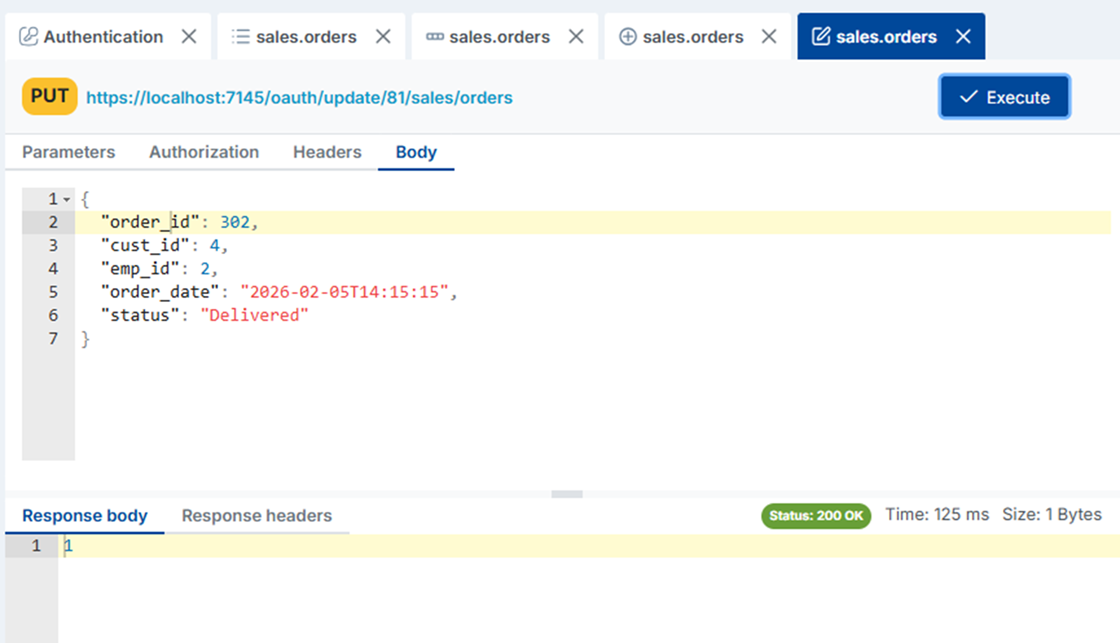
2.5 Update a Record
Update an existing record. Provide the primary key and the fields you wish to change in the JSON body.
PUT https://[YOUR_DATAKOOK_INSTANCE]/oauth/update/[db_id]/[schema]/[table]

Content-Type: application/json
{ "id": 42, "column1": "newValue", ... }| Status | Body | Meaning |
|---|---|---|
200 | 1 | Record updated successfully |
401 | — | No token or token expired |
400 | Error message | Validation or database error |
2.6 Delete a Record by ID
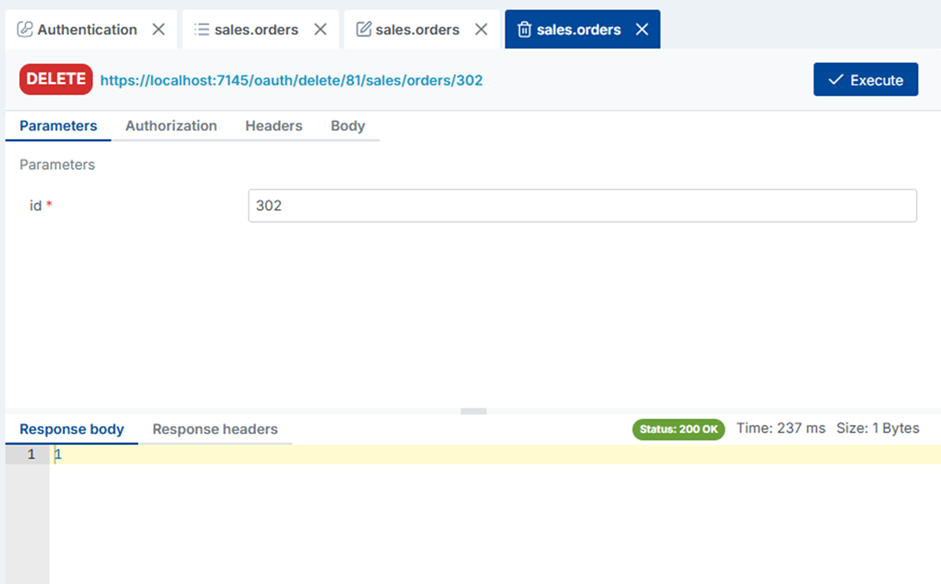
Permanently delete a single record identified by its primary key.
DELETE https://[YOUR_DATAKOOK_INSTANCE]/oauth/delete/[db_id]/[schema]/[table]/[id]| Status | Body | Meaning |
|---|---|---|
200 | 1 | Record deleted successfully |
401 | — | No token or token expired |
400 | Error message | Validation or database error |
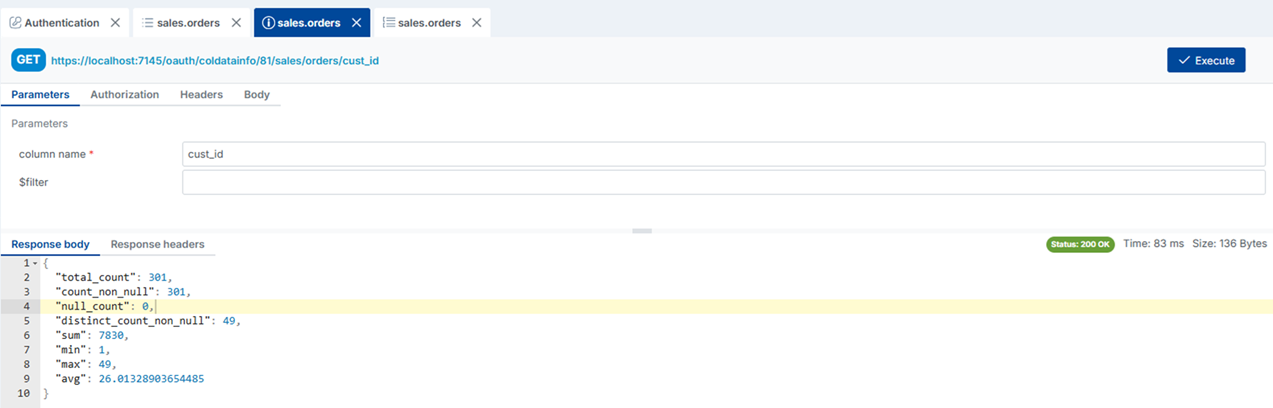
2.7 Column Info
Retrieve metadata about a specific column in a table — including data type, nullable flag, max length, default value, and any constraints. Useful for building dynamic forms or validation logic in front-end applications.
GET https://[YOUR_DATAKOOK_INSTANCE]/oauth/coldatainfo/[db_id]/[schema]/[table]/[column_name]Returns HTTP 200 with a JSON object containing the column's metadata.
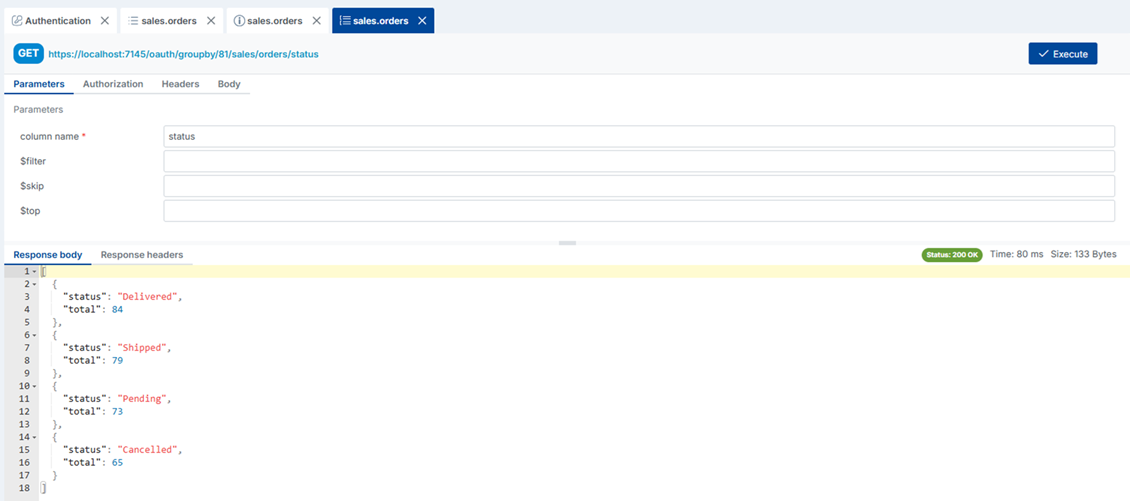
2.8 Group By
Retrieve a distinct grouping of values for a given column along with the count of records in each group. Ideal for populating dropdown filters, summary dashboards, or charts without writing SQL aggregation queries.
GET https://[YOUR_DATAKOOK_INSTANCE]/oauth/groupby/[db_id]/[schema]/[table]/[column_name]Returns an array of objects, each containing the grouped value and the corresponding record count.
3. Test API with External Authentication
If your API is configured to use External Authentication (JWT from your own identity provider), you can test it directly from DataKook's built-in interface by clicking API with External Authentication from the REST APIs dashboard.
The testing interface allows you to paste a JWT token obtained from your identity provider and execute live calls against your DataKook API endpoints. This makes it easy to validate that your token configuration (issuer, audience, signing key, algorithm) is correctly set up before connecting your frontend application.
If a call fails with a 401 Unauthorized response, review your token claims (iss, aud, exp) and compare them against the configuration saved in DataKook's External Authentication settings.